
Unlocking the mysteries of seeds
First, let me say that I am a relative novice growing plants (intentionally) from seed. In the few years that I’ve attempted to grow wildflowers and herbs from seed, I’ve learned one important lesson ~ it requires patience and attention to timing.

Asclepias incarnata ‘Cinderella’, year two
In the wild (or in our suburban gardens), seeds require a specific combination of light, moisture and soil temperature in order to germinate. Most seeds that drop from the plant in the fall months have an internal clock that prevents germination until the following spring. Seeds like asclepias, aka milkweed, need a period of cold to break dormancy and germinate. This is called cold stratification and can be achieved artificially in your refrigerator for a few months in the winter, or by simply overwintering seed pots outdoors in the garden. I find the latter the easiest to implement as it lets ‘nature be nature’ ~ with a bit of encouragement from us as to exact location of the plant ~ and requires no additional human intervention.
asclepias AKA ‘Milkweed’ seeds

Bumblebee feasts upon pollen and nectar from asclepias tuberosa, aka ‘Butterfly Weed’ in The Big Little Garden
If you don’t intend to winter sow (see above), I recommend planting your milkweed seeds directly into the garden in the fall, allowing the period of cold stratification to occur naturally. Plant your seeds as follows:
Asclepias incarnata ‘Cinderella’ seedling volunteer, first year
locate a space in your garden that receives at least 6 hours of sun per day (this does not have to be continuous) with well-draining soil
ensure that the footprint for the spring seedling can accommodate a plant that will grow to at least 18”x20” for asclepias tuberosa, or 24”x30” for asclepias incarnata ‘Ice Ballet’ and 30”x36” for asclepias incarnata ‘Cinderella’
before the ground freezes, slightly scratch and loosen the soil, mist with water, deposit the milkweed seed, and lightly cover with 1/4” of soil
mark the planting site with something permanent, like a circle of small rocks or popsicle sticks. I also like to use plastic forks as markers. The goal is to clearly indicate that the area is dedicated to seed growing, which will prevent inadvertent disturbance or overplanting of something else.
if you want to hedge your bet, plant 3 or 4 seeds a couple inches apart in the same footprint, then in the spring thin out or transplant all but the strongest seedling.
in the spring, wait, wait and then wait some more. Year one seedlings seem to take forever to germinate, and asclepias plants in year two and subsequent years are frequently the last perennial in my garden to make an appearance. Don’t give up! This requires patience and faith!
once your seedling is a few inches tall, you can mark it temporarily with a tall plant prop or other marker until it is large enough not to be accidentally overlooked and damaged
again, year one seedlings will put their energy into root and plant formation and may not bloom. Monarch butterflies will still visit to lay eggs! Year two and beyond plants will grow larger every year with more and more blooms which produce dozens of seed pods in the fall.
to harvest the seed pods of your adult plants, wait until the pods dry and begin to split open. Remove the pod from the plant and break apart to remove seeds. Store harvested seeds in brown paper in a dark, dry location until the time to plant or share with friends arrives!
whether or not you remove the seed pods, seeds will certainly escape and you are 100% guaranteed to find milkweed seedlings popping up around the garden the next spring. When seedlings are 6” or so tall, they can easily be lifted and transplanted around the garden or potted up and given to friends.
additional tips:
never ever use pesticides or herbicides of any type on your milkweed plants as that most certainly puts the Monarch caterpillars and butterflies who feast upon it at risk.
grow your milkweed in a mixed border with a variety of summer and fall blooming perennials and shrubs. Monarchs will only lay eggs on milkweed, but they will gladly feast nectar from many other blooming plants, including agastache, tithonia, verbena bonariensis, phlox, joe pye weed, goldenrod, cosmos, echinacea & more!
Please send me photos of your milkweed plants that grew from seed!
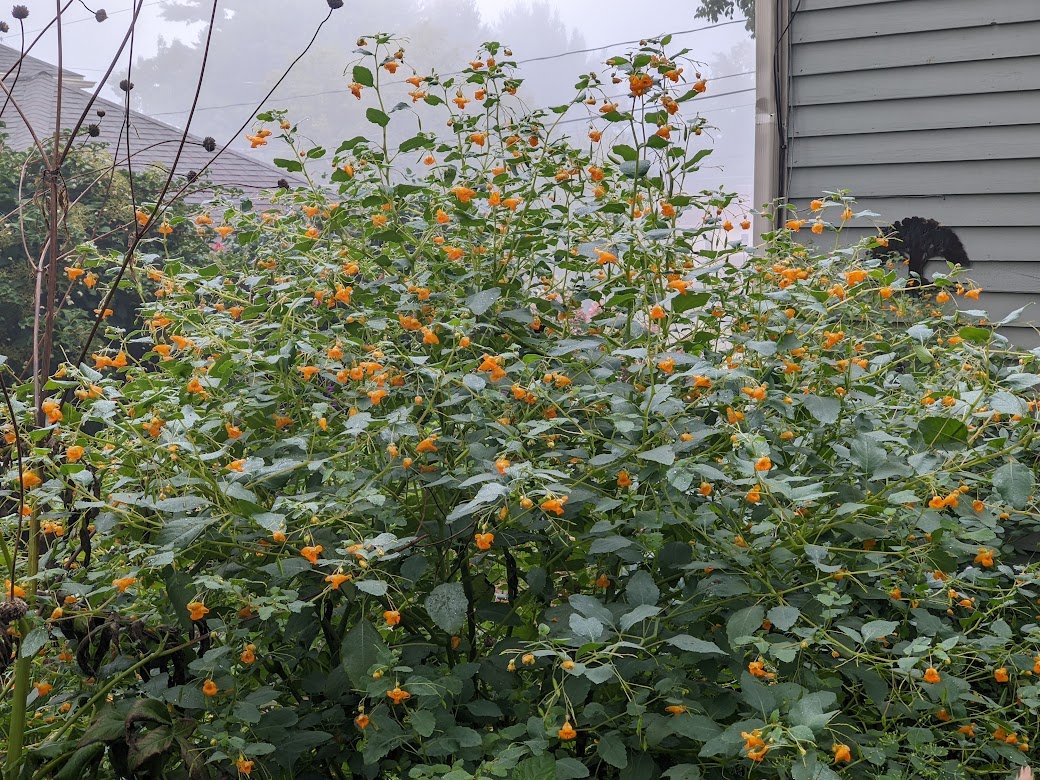
Impatiens capensis, aka ‘Jewelweed’, aka ‘Spotted Touch-me-not’
I recently discovered this amazing North America native plant and am anxious to share seeds and seedlings with gardeners who are ‘up for an adventure’, so to speak. In the summer of 2021, I purchased a couple small jewelweed seedlings from Blue Stem Natives in Norwell, MA, not really knowing what to expect. They found a home in a newly dug and prepared garden bed that I was devoting to indigenous plants, including monarda fistulosa, zizia (Golden Alexanders), blue lobelia, field thistle, lance-leaf loosestrife (not the invasive one!), and milkweed.
The first year, they grew nicely and bloomed beautifully. The bumblebees, especially were quite pleased. That fall, while I was ‘busy doing other things’, the seed pods erupted and scattered hundreds ~ dare I say thousands ~ of seeds in the garden bed. I was entirely unaware this had happened. In early May, we returned from a trip to Portland, Oregon to find the bed literally blanketed with jewelweed seedlings! While this was a beautiful sight, there were way too many, but I found that they very easily pulled out of the ground and I was able to pot them up and share with friends. I left a few in various sections of the bed and through the summer found myself pruning the enormous plants to control their size and vigor. They responded quite well, developing quite hefty trunks and branches (although hollow, and ultimately somewhat fragile). Photos below show the growth progression (click and hover for descriptions and to launch slideshow):


Now that I have a full season growing jewelweed under my belt, I will be better equipped to handle its growth and spread next year. But, it was fun to learn about this amazing native plant, and this week I’ve been harvesting the seeds. The plants produce hundreds of bean-like pods that explode the moment you touch them, scattering green seeds all over the garden. If I’ve sent you seeds, they need to planted in a moist, part-shade/part-sun location as soon as possible. Just scatter, keeping seeds close together, barely cover, moisten and wait for the magic to happen next spring!
If you haven’t requested seeds this fall, please let me know if you’d like to come pick up seedlings next May for transplanting to your own garden!
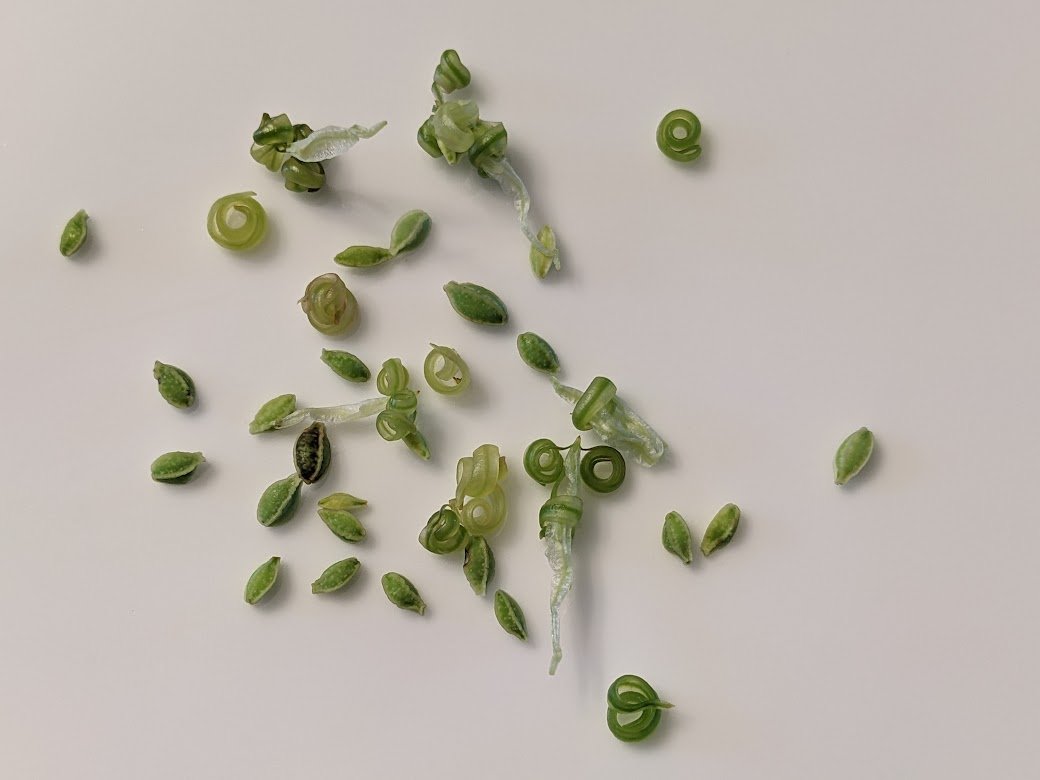
freshly harvested jewelweed seeds ready for planting